Pages

Thursday, December 29, 2011

Dad's Christmas Quilt

The embroidery reads, "Merry Christmas 2011"
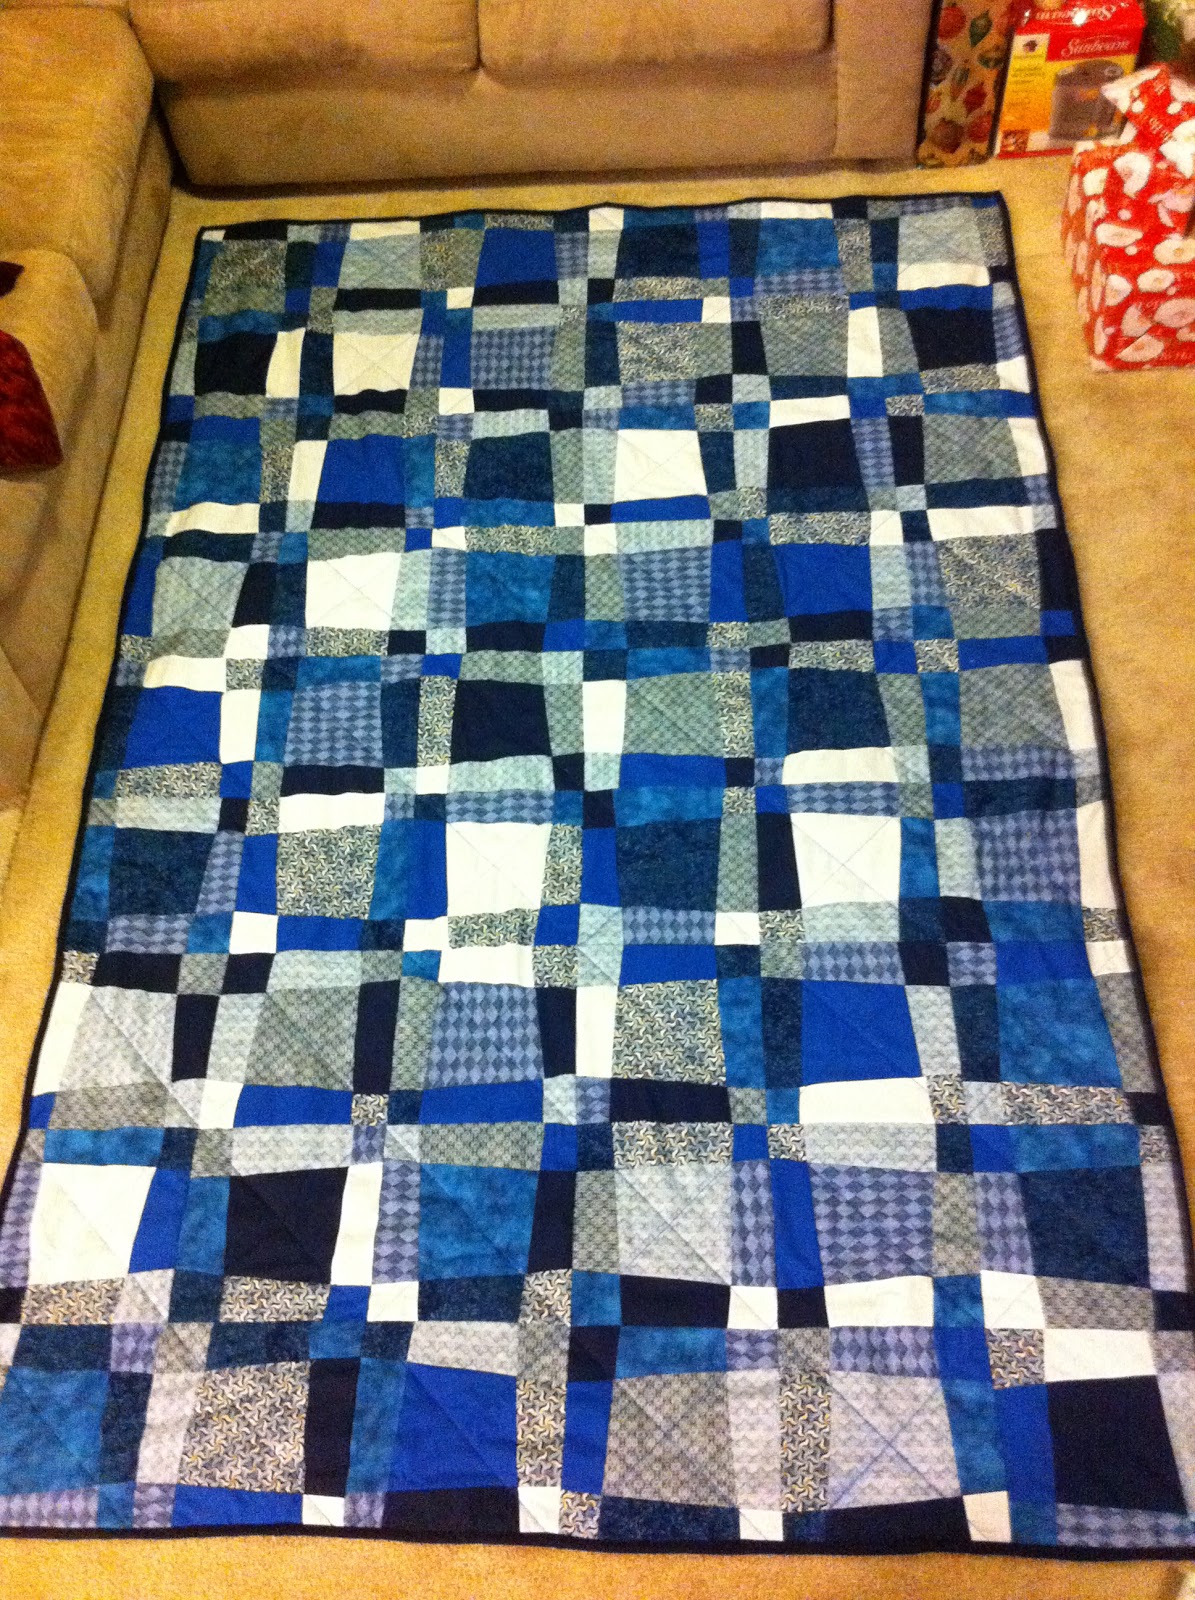
Now that Christmas Day has passed, I'm free and clear to post pics of a quilt I made specifically for my dad. I gave it to him for Christmas this year :)
I must say, Cory and I have grown to love celebrating Christmas as just the 2 of us (+Cruze) since we've had to the past few years (our employment has stunted our options), but this year my one regret would be that I wasn't able to see my dad open his quilt for the first time.

Quilts are interesting. So much time and effort and planning and work go into them. As a quilter, I've learned that its much harder than one might think to part with each quilt. I've grown up with a very sentimental family, and I knew if anyone would like something I've made it would be my dad. Because of this, It was far from a chore to create his quilt, but I still felt very anxious about his receiving reaction. Especially since he had no idea I was doing anything like this!

I was only able to speak with my family briefly on Christmas Day. They're attention was diverted elsewhere, particularly because they spent a fair amount of time talking to my brother Spencer, who is finishing out his mission in Oaxaca, Mexico, (Feel free to visit his blog of which I am the creator and administrator!) and my grandparents were also over for most of the day. Good distractions, but still. :)

From the words that we did exchange, my dad specifically praised and thanked me for the quilt, which just put me on cloud 9. :)
Tuesday, while Dad was at work, I called up my mom and sister, who told me that the quilt was a hit. They said Dad loved it, was very impressed with it, and showed it off to Nana & Papa once they arrived.

Crazy-cut front
Minky backing

This is why I quilt. This is why I spend hours and hours and hours on each one. To me, it's worth the effort when the recipient really appreciates the finished product. :)

Merry Christmas!

Tuesday, December 20, 2011

Commissioned Quilt

It was the first quilt that I've ever been paid to make, and it was a beast. Cory's coworker heard in passing that I make quilts, and once she heard that she kept after it until Cory decided she was serious and showed her pictures of my projects past. 
(Molly's green quilt)
She picked this green quilt I'd made for my BFF Molly and said she'd like one just like it in blue & white, but also much bigger. So we negotiated a price (I gave her a screamin' good deal), she paid Cory and I got to work.

Going to the fabric store to select all the fabric for a quilt like this was daunting. I don't know this lady, or her daughter's boyfriend (who the quilt is going to be a gift for), nor have I even met her, and she's paying me to do this! No pressure right? :)
I asked Cory plenty of questions before-hand, and gathered as much information as I could about what she wanted. It was easy enough. Like she said at the get-go, she wanted it to be twin-sized, blue & white with blue fabric, preferably minky, on the back. That was all the direction I was given. 

 (Fabric selection)
I'm pretty sure that if you all could see me shop at Jo-Ann's you would think I was neurotic. I have a system. When it comes to selecting all the fabric for a quilt at once instead of piecing a quilt face together from remnants, it gets weird. I seriously do about 4 laps through every fabric isle grabbing everything with potential. Then I find an empty shelf (there always is one) where I set up all of my potentials and begin arranging, adding, subtracting and eliminating. When I think I have it, I step back and take a pic. If the pic is good, I head to the cutting counter.

So this is what I came up with!


 (First set of blocks laid out as a test)
I can always tell that a "crazy cut" quilt is going to look good if I get nervous as I make the first set of blocks. It's a weird feeling. First, I start second-guessing myself and doubting if my fabric choices were off, then I realize that every time I feel this way at the beginning, it always looks great. The real litmus test is to lay out the first set of blocks once they're pieced and trued. That kind of foreshadows the rest of the project.
(before I ripped it apart)
I hit a road-block of sorts with the backing. I use minky all the time, and it usually puts up a fight, but this time it brought out the big guns. Lets just say after a lot of stress and a lot of work for nothing I pulled my nearly finished quilt apart and put super soft navy blue flannel on the back like I probably should have in the first place.

In the end, it turned out just how I'd hoped. I cleaned it up, folded it up and put it in a bag ready for Cory to take it away. Then I remembered I needed to take some pictures since I'd never see it again! So it's a bit wrinkly, but here's my finished product!! (some pics in daylight, some at night... I pulled an all-nighter and finished it between 4 & 5 this morning!)


She asked me to embroider "A mother's heart is a patchwork of love" and "Jeremy 2011" onto the quilt. So I made a strip to go across the back and added the message there.


:)

Monday, December 12, 2011

My Ruffled Tree Skirt

Finished the tree skirt! And just in time too. One of Cory's co-workers just commissioned me to make a quilt by Christmas! I've never been paid to be crafty! Well, cutting & coloring hair is definitely an art, but this is different. I'm excited!
On facebook I asked my friends what kind of tree skirt I should make, and the vote was unanimously "ruffles"! I'm glad too, it turned out SO CUTE. (patting myself on the back, which is still a little sore from all the crafting) :)

It's made of burlap & muslin. (And the little bows are lace ribbon)
I wasn't excited to work with the burlap at first, I've never used it before and it frays like a beast. Once I Mod Podged the raw edges (which was a little tedious, but it had to be done) all was well & the beast was tamed.
I used this tutorial I found on Pinterest for inspiration, but I did a few things differently. They left all their muslin edges raw, which seemed like a nice way for this tree skirt to self-destruct over time, so I hemmed the outer edges of my fabric before ruffling it. Also, they applied Mod Podge to seal the brulap at the end of the project, which seemed like the messiest way it could be done. I did it as I went along so I didn't get it all over my finished project.

Apply Mod Podge row by row to all raw burlap edges.


Hem raw muslin edges for a stronger end result. 


To give my skirt a finished look, (the edges looked like a mess before this step) I sewed my ribbon on first, and then bound the raw edges with muslin, similar to how a quilt is bound.


Doesn't that look so much more polished? I did like their use of lace in the original tutorial, but for Cory's sake I kept the floofy level down a bit since the ruffles are already pretty feminine :)

I'm in love with it!